

Author Archives: 2010admin

You’ve been spending a lot of time at home recently. And maybe you’ve started noticing some things about it you don’t quite love as much as you used to. Now is the perfect time to make some changes! But if you’re worried your motivation is a little bigger than your budget, don’t be. Go ahead and get excited because there are a lot of simple and effective ways to update your interior without breaking the bank. Our expert designers are sharing 5 budget-friendly home upgrades for you to do right now.
- Give Your Walls A Little Pop
A fresh coat of paint can work wonders if you want to make a room feel brighter, bigger or brand new. Add a new coat of your existing paint color for a refresh, or try a whole new hue for a totally new look! Lighter wall colors can make any room feel more open, so a white-based paint can be the perfect change for summer!
If you’re looking to switch things up with a little more flare, try a statement wall! A fun pattern or playful design is an easy way to make a big change on a small budget. Gallery walls, floating shelves or fun art pieces are a few other great ways to show your walls some love.
- Refresh Your Decor
A simple way to revamp multiple rooms of your home without making any major changes is to refresh your decor throughout. Here are some little swaps and switches that can make a big difference:
-
- Statement rugs can change the entire feel of a room — often because they are one of the largest pieces in a room. Adding a new rug and experimenting with its size, pattern, and color can quickly make a room feel brand new and add definition.
- Adding plants and greenery to your home is a super easy and budget-friendly way to freshen up your home and give it a more natural feel in any season. And as an added bonus, indoor plants will help purify the air and improve your home’s health!
- Switching out your throw pillows can really refashion a room, while boosting its coziness level. And since it’s such a simple switch, you can make it multiple times year-round, so you get a new look every season.
- Adding or changing a room’s wall hangings can bring new life to your room. Adding wall art, or switching out the frames of your current wall hangings, will make your home feel more personalized and complete.
- Modernize Your Hardware
Replacing your home’s outdated hardware and fixtures can make a big impact not only on aesthetics, but daily functionality too. It’s a simple, relatively inexpensive task that can easily make any room feel more modern. And since you use so many of these items multiple times a day, it’s an improvement that doesn’t go unnoticed. Try switching out your faucets, light fixtures, showerheads, and door handles for trendy brass pulls or even patterned ceramic knobs versus standard pulls, or mix and match metals to add more layers to your design.
- Switch Out Your Older Appliances
Much like hardware, upgrading your home’s appliances is a small change that goes a long way. And the best part is, this swap can also save you in the long run if you invest in energy-efficient options. Even updating less expensive appliances like your microwave, coffeemaker, or refrigerator can give your kitchen a fresh, modern look and really make your daily routine a lot easier.
Overall, upgrading your older appliances can really be as big of an investment as you like, since the price of upgrading depends on your choice of appliance and model. So shop around a bit, and look for deals — you have a lot of control in minimizing costs!
- Let Your Windows Shine
Though often overlooked, windows can really improve the mood of any room with the right care and attention. Adding new curtains with more length can help ceilings feel taller and a feel bigger, while bold colors or patterns can become the focal point of a room. And just like the right picture frame, updating your window frames are a great way to get a modern, high-end look. Not to mention, simply cleaning your windows will allow more natural light to pass through the pane to brighten and open up your space for practically no cost at all!
With these simple, easy, and inexpensive upgrades, you’ll be loving your home’s new look and feel in no time! For more inspiration or ideas on how to show your home a little TLC on a budget, contact our design experts today!
Summer is here, and it’s hot! So when the best way to escape rising temperatures is to just stay inside, why not check a few things off your home maintenance checklist? After all, a clean, efficient home is not only super important all year round, but it’s crucial for your health and comfort during the hottest months of the year! So we’ve created a list of indoor home improvement projects you can do to help you beat the heat this summer.
- Clean Your Filters
Air conditioning becomes your best friend when temperatures start hitting the 80s and 90s. Make sure that your AC is working to its fullest potential by cleaning out the filters in your unit. It’s pretty easy; filters can often be washed with just a bit of warm water or cleaned out with a vacuum brush. And if you have a disposable filter — even easier! The dog days of summer are a perfect time to see if it needs to be replaced. Routine filter cleaning or replacement will not only keep you more comfortable, but it can help keep your home safer. When excess dust and dirt accumulate within your filter it can increase the risk of catching fire. Let’s keep the fire on the grill!
Pro tip: Your HVAC system should be checked/serviced every six months by a professional. Cleaning or replacing your filter is a great way to maximize your comfort in between visits, but an experienced technician can make sure there is no damage or issues with the system for complete peace of mind.
- Reverse Your Ceiling Fans
If your ceiling fan is spinning in a clockwise direction, it’s not helping to cool your home! During the summer months, switch your ceiling fan direction so that it is spinning counterclockwise. The motion created by the counterclockwise spin will push air downwards, creating an artificial gust of wind. This downwards airflow will keep you cool, as opposed to the updraft created by a clockwise spin. To reverse your fan’s flow, simply flip the direction switch on the body of the fan or wherever your ceiling fan’s control center is located.
- Check Your Home’s Cooling Features
There’s no point in having weather stripping if it doesn’t work! In the summer, make sure that your home’s weather stripping is intact so that your doors and windows keep the cool air in, and the hot air out. If there are drafts or leaks through your weather stripping, now is the time to update!
And while you’re at it, check your home’s vents and air ducts to ensure that your cooling systems are working properly. To routinely check your air ducts for leaks or damage, simply sweep over your system for any obvious tears. You can also unscrew your vents and look for particle buildup or mildew that can keep clean air from circulating in your home.
- Update Your Summer-Friendly Decor
The way you furnish and decorate your home can influence how cool it is in more ways than one. Here are some ways to create a cool escape inside your home:
- Use curtains that are stylish and functional! In the summer, thermal and insulated curtains can help keep cool air in and hot air out. Light-colored curtains with a reflective backing can help reflect heat and radiation away from your home.
- Paint colors can actually determine your home’s temperature. Lighter interior paint colors reflect light and heat, keeping your walls cool.
- LED bulbs produce less heat than CFLs, so using these types of lightbulbs can really affect cooling too. Maybe it’s time for a switch!
- Synthetic carpeting can trap heat in the summer months. Switching to wood or tile floors can help keep your home cool and create a sleek new look (while almost always improving your home value too!).
- Replace Faucets and Showerheads
Updating your showerheads, faucets, and other hardware is a simple task that can completely change a room. Plus, you can do it indoors to be productive while avoiding the heat! Switching out an old showerhead or faucet can create a new, modern look and help improve water flow. By replacing a blocked or old showerhead, you can make sure the water is flowing to its full potential – because those cold showers are too important on the hottest of days!
With these simple projects, you and your home will be ready to beat the heat, no matter how hot it may get! For questions you have about your cooling or plumbing, or for any other summer maintenance needs, contact us today!
Rising temperatures. Chirping birds. Blooming flowers… The first signs of spring are exciting! But what’s not so exciting about this time of year? Spring cleaning. The truth is sometimes the hardest part is simply getting started. That’s why we’ve put together our favorite tips to help you freshen up both inside and out. Check out these 8 pro tips to make this year’s spring cleaning a breeze.
- Plan to Clean Room-By-Room
Approach your spring clean one room at a time. Focusing on just one space is the best way to get a thorough clean and actually feel the progress you’re making. Make checklists for each room of the different things you want to accomplish and focus on items that have been neglected the longest first. Plan out what days you want to tackle which rooms, and get the whole family on-board to be as efficient as possible!
Also, take this opportunity to make some small changes that transform a room from feeling dark and dense to feeling light and fresh. Add colorful pillows, swap out heavy comforters and blankets, incorporate greens and flowers (both real and fake!), and replace darker table linens. Hello, spring!
- And to Clean Top to Bottom
Makes sense, right? By starting high with ceiling fans, walls, and tall windows, you can force debris downward and prevent having to re-dust or reclean multiple times. Grab a vacuum with an extension hose to nab cobwebs and dust from up high then move on to furniture and countertops before finishing up with the floors. - Organize Your Kitchen Pantry… Finally
Stop tossing away expired or stale pantry items just because you forgot you even had them. It’s time to invest in some shelf organizers and reusable containers with airtight lids. Then place newer items toward the back and items you use more regularly at eye-level. Anything the kids should have or need access to should be within their reach so they won’t always need to ask for your help.
- Get Windows Really Clear – and Ready for Rain
Even if you wipe down the inside of your windows pretty regularly, you’ll never achieve that eye-catching clean until you take the time to open up and work the outside too. A steam cleaner and squeegee to wash away spots and smudges on the outside panes is a great alternative to a chemical cleaner, and choose a cloudy day, so you can make sure the sun doesn’t dry the cleaner before you’re finished.
Also — don’t forget to check both windows and doors for any leaks or drafts, particularly near the corners. Chipped or peeling paint can also be a sign of water intrusion, so if you see it, seal these up before April Showers bring more problems. - Be Green When You Clean
The best way to be green when you freshen up is keeping cleaners to a minimum. You can still get a real deep clean without exposing your family to dangerous toxins and chemicals with helpful hacks that use natural cleaners, such as:
- A Steam cleaner works wonders on everything from floors and carpets to microwaves and bathrooms.
- Use baking soda to clean stainless steel sinks. Just add water and scrub with a sponge. Some salt can add an extra heavy-duty clean.
- Place a wet dryer sheet on your ceramic stove top to remove burnt-on residue in a non-abrasive way. Leave for 15 minutes before rubbing away.
- Get a streak-free shine on windows and mirrors with newspaper. Spray a mixture of ¼ cup of white vinegar, 2 cups of water, and 2 teaspoons of liquid soap to the surface and the ink on the newspaper will act as a gentle abrasive as you wipe away.
- Heat lemon juice and rinds in water to loosen grime build-up in your microwave. Squeeze the juice of half a lemon and add rinds into ½ a cup of water, microwave for 3 minutes, and let sit for 5 minutes before opening.
- Stack Clothes Vertically
As you swap your winter wardrobe for spring and summer attire, think about how you organize them. Instead of folding everything flat, stack your clothing vertically, so you can see all your options and access them more easily. And to help keep everything in place, try attaching grippy Velcro strips from one end of the drawer to the other to help keep dividers and organizers from sliding around as you take items in and out.
- Don’t Forget About Your Air
One of the most overlooked parts of spring cleaning is also one of the most important! Replacing old HVAC units and filters is the best way to ensure your family will breath healthy all spring. After a long winter, these dirty air filters won’t work as well in catching dust and other pollutants, so it’s time to get a new one. And try swapping that standard filter with one that has a higher MERV rating to catch smaller particles that cause irritations during allergy season.
Maybe it’s also time for that routine maintenance? Contact us to have one of our HVAC experts come out and check all the components of your unit and make any necessary repairs to ensure it’ll provide the best airflow and quality for your family this season.
- Get Ready to Entertain
Outdoor entertaining season is upon us! Rain may wash away some dirt and pollen from your patio furniture, but they’ll need a little scrub down too. A mild detergent and warm water will go a long way to keep furniture looking and feeling its best. Use a spray bottle and sponge or gentle scrubber to wash cushions and get all corners clean before rinsing thoroughly.And before you fire up the grill for the first time, remove the grates and soak them for 15 minutes before scrubbing clean with a wire brush to make cleaning easier. Inside the grill, known as “the grill box,” should also be scraped with a thin flat tool or old spatula to remove as much caked-on gunk as possible. Inspect burners for any signs of corrosion or blockage (spider eggs are a common sight here!) and use a wire brush to clean deep into the flame holes. Lastly, heat the grill at least 10 minutes before throwing on the burgers and dogs.With these helpful tips, you don’t have to dread spring cleaning. So before the season is in full bloom and bbqs, sporting events, pool parties, and more fill up your schedule, make sure your home is looking and feeling its best.

Did you know that over half the energy bill in the average American household goes toward heating and cooling? Your thermostats is a powerful little device; giving you the ability to control the comfort of your entire home. But now in the peak of winter or during the dogs days of summer, keeping your home comfortable without breaking the bank can be a challenge.
Enter: the smart thermostat. You’ve probably heard about their growing popularity in homes all across the country, but you’re wondering are they really worth it? Here’s exactly how a smart thermostat could be saving you money.
What Do Smart Thermostats Work?
While a traditional thermostat allows you to control the temperature of your home via a tiny control panel on your wall, smart thermostats give you control of so much more than that.
Optimal Convenience
If you enjoy convenience, you’ll love having the ability to change your temperature settings from basically anywhere. Using your smartphone, computer, or even your voice (with devices like Amazon Echo or Alexa), you can change your settings from wherever you are to keep your home at your preferred comfort level only when you need it to be.
Long day at the office? Turn up your AC on the way home from work so it’s nice and cool when you step in the door. Forget to reset before bed? Adjust the heat without ever leaving the comfort of your covers at night.
Total Control
What’s even better is you can actually schedule your smart thermostat to specific temperatures during the day when no one is home or when someone is about to arrive. Geofencing allows the thermostat to know when you or a family member is close to home, so it will adjust accordingly to your preferred setting, and you won’t have to do a thing.
You can also program the thermostat to automatically adjust to energy-saving temperatures, so you’re never wasting energy. And if you have an ENERGY STAR certified smart thermostat, it will even go into low-power standby mode when it’s been inactive for a set length of time.
Helpful Insight
Ignorance is not always bliss, especially when it comes to your energy usage. Smart thermostats keep you in the know with equipment use and temperature data which you can track and manage before your bill arrives.
And with automatic, periodic software updates, you know your smart thermostat is always using the latest algorithms in energy-saving technology possible.
How Does That Save Me Money?
Since the only real way to spend less is to heat and cool less, simply programming your thermostat correctly can save you a lot of money. But easier said than done in a busy household. The best part, aka the “smart” part, of a smart thermostat is knowing when to lower your usage so you don’t have to sacrifice your comfort. Instead, it does it when you don’t notice. It also never forgets, and it promises to never be lazy.
Research by ecobee boldly claims that their customers saved up to an impressive 23% on their heating and cooling costs with a smart thermostat. While another study by Nest showed that their customers saved 10-12% on average for heating costs and 15% on air conditioning costs. No matter what smart thermostat you choose, those savings really add up. You can calculate what these numbers will mean for your household here.
You can also check with your local service provider to see if they offer additional incentives for having a smart thermostat. In many cases, homeowners enjoy rebates or other benefits for having a smart thermostat brand that’s partnered with their local utility company. Who doesn’t love extra savings?
So Is It Worth It?
While a smart thermostat can cost you around $250-$500 – depending on the model and level of sophistication – compared to $25-50 for a basic thermostat, the long-term savings and convenience are certainly worth the initial costs. In fact, based on ecobee’s reported savings, you can pay off the purchase of a new smart thermostat in less than a year. Not to mention, each new iteration of this technology offers more intuitive, user-friendly, and cost-saving benefits. Forget forgetting to adjust the thermostat when you leave the house or wasting time messing around with complicated control schedules and manual operations. It’s time for an upgrade. When you’re ready to start saving money with a smart thermostat in your home, contact Madsen, so our team of technicians specializing in installing the top digital brands on the market can help you today.
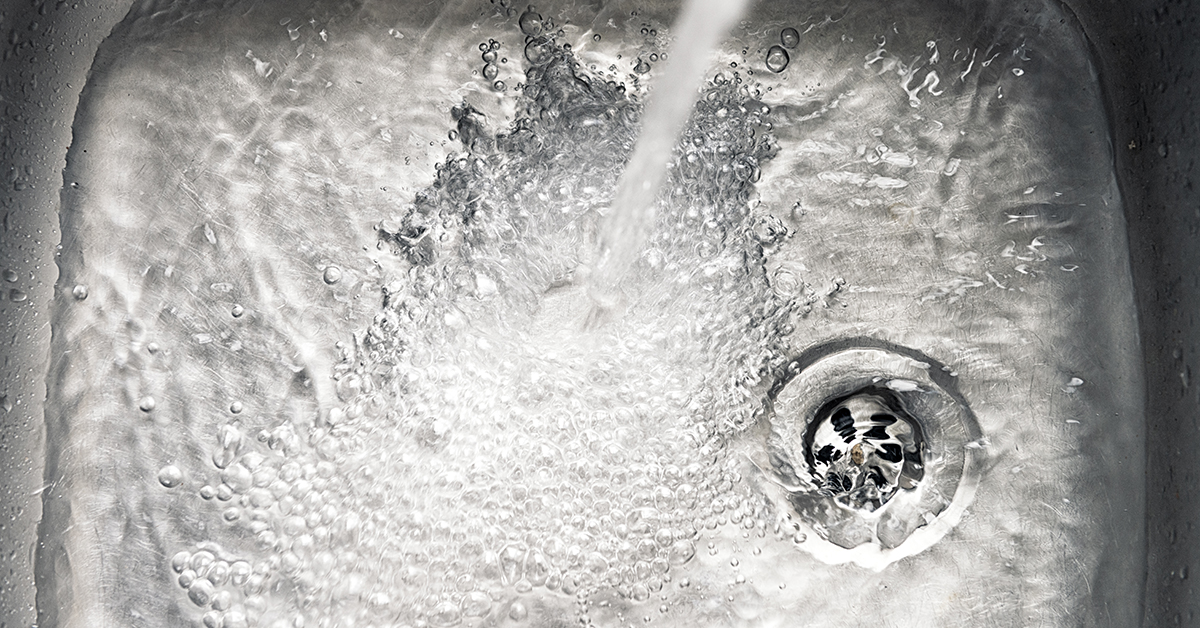
We rely on our drains a lot. Yet, few of us actually think about it until we’re trying to wash our hands or take a shower and the water isn’t draining. In reality, water isn’t the only thing our pipes see. Hair, grease, grime, and even soaps can have damaging effects on your system. In fact, many store-bought cleaners you think are helping your pipes, are actually making things worse too.
No one likes the inconvenience of a clogged drain, so here’s how you can keep your plumbing flowing smoothly with the help of a professional drain cleaning.
Why You Shouldn’t Use Store Bought Cleaners
They May Not Even Work
Even though your drain is clogged, it may not mean your pipes are. There could be underlying issues that a drain cleaner won’t fix. And if it’s a bigger issue like a broken pipe, pouring cleaner down the drain and not knowing where it’s actually ending up is just asking for more problems.
They Contain Toxic Chemicals
The chemicals in store-bought cleaners contain chemicals that actually weaken your pipes overtime. They help work to breakdown the clog, but in turn, cause a reaction that releases heat and deteriorates your pipes – especially PVC pipes. So while you’ve got a quick solution now, you could be creating more serious issues down the road. And in other cases, those chemicals may just sit in your pipes, and eat away at them until removed by a professional.
They Could Have an Adverse Effects
Those same chemicals that are hurting your pipes are also being mixed into your water supply. And when it does, it can affect you and your family, as well as other people and wildlife. The harmful fumes linger in the air even after the cleaner is down the drain and the leftover residue in the bottle is likely to end up in the soil around garbage dump.
When Should I Call a Professional?
Just because you’re not battling sitting water, doesn’t mean your pipes aren’t in dire need of a good clean. Here are 4 signs of when it’s time to get your drains professionally cleaned.
- Slow Drainage
A clogged drain is the most common issue you’ll face with your sewer system. And it’s pretty rare it will happen without warning. Overtime, waste will gradually build on the pipe walls making it harder for water to get through. If you notice your water draining more slowly than usual, you shouldn’t wait until it becomes a full-blown backup to call a professional for expert cleaning services. - Gurgling Sounds
When you notice bubbling water coming up from your drain, it’s a pretty clear sign of a problem. Obviously, the water has nowhere to go, so there’s likely a major backup somewhere in the pipes. As soon as you notice this, it’s time to call an expert who has the tools and expertise to clear the waste in the safest way for your pipes and get things flowing again. - Terrible Smell
No one likes unpleasant smells. This is another common sign that it’s time for a good pipe cleaning – especially in the kitchen sink. The food or waste in your pipes that’s eventually going to cause a backup is more likely than not going to start exuding a terrible smell too. But it’s also important to keep in mind that not all bad smells mean a clogged drain. There could be a deeper issue in the sewer system, which can be extremely destructive to your pipes if not taken care of quickly. A tip: if more than one of your drains is smelly, then it’s likely a more serious issue. - Low Water Pressure
Buildup in your drain can even affect your fixtures – like faucets and showerheads – as well. Clogged mineral deposits will cause the water pressure to decrease, and often a simple cleaning won’t do the trick. When your water isn’t quite flowing like it should be, contact a professional to help.
With a professional drain cleaning, you can make sure to keep your home healthier – and odor-free – for longer, while reducing out-of-pocket expenses on plumbing repairs. To have a professional come out to check on your drains, contact the certified plumbers Madsen Inc. today.